Written for version 2.2.1 (installed application)
To get the latest version of Twine, go to www.twinery.org
This tutorial outlines the basic steps for using Twine 2 to create interactive fiction. The information included below covers the following:
- Creating a story
- Editing a passage
- Creating links
- Creating alternate-text links
- Changing story formats
- Publishing a story
1. Creating a story
To create a story in Twine 2, click the green “+Story” button on the right side of the Twine home screen. After clicking, you will need to enter a name for your story.

For this tutorial, the story will be named “Example.” Wherever you see the word “Example” in this tutorial’s images, Twine will display the name of your story as you entered it when you created the story.
Once you have created your story, Twine will open the story map, the main screen from which you will edit your story. At this point, your story will contain exactly one passage, which will be called “Untitled Passage.”
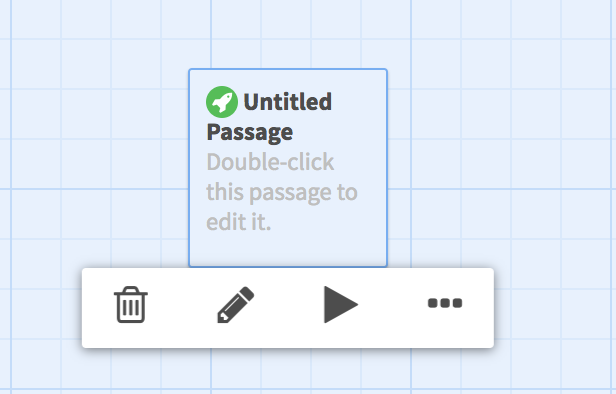
If you hover your mouse cursor over that passage, Twine will display a small menu with a set of options. From left to right, these options are: a delete button, an edit button, a “test from here” button, and a button that lets you access more options.
2. Editing a passage
To edit a passage, double-click on the passage itself or click the edit button from the passage menu shown above. Either method will open a window that allows you to edit the passage text, tags, and title. Until you edit the passage, it will contain the placeholder text: “Double-click this passage to edit it.”
![]()
Your players will not see the passage title unless you choose to include it somewhere in your passage text. However, the passage title will be used to create basic links, which the player will see (more on this later). The most important thing to remember about passage titles is that each passage needs a unique name. In ideal circumstances, each passage will have a name that you will remember, helping you keep track of your story’s passages and flow.
The text you enter into the body of the passage is what the player will read when he or she plays your game. Use this text to set up scenes, present dialogue, and tell your story in whatever way makes the most sense for you and your creative ideas.
When you want the player to make a choice or click to advance the story, you’ll need to create one or more links.
3. Creating links
Links are the most important part of a Twine story or game. They’re the bits that let the player interact with the file, which is what makes interactive fiction special. At their simplest, links can represent page-turning actions, loading a new passage of text like turning a page in a book. They can also represent character actions, letting the player decide, for example, whether to hide in the cupboard or escape out the window. They might let the player choose to speak a chosen line of dialogue that will unlock a character for an important quest. In other words, links create opportunities for the player to click on some text and influence the progression of the story.
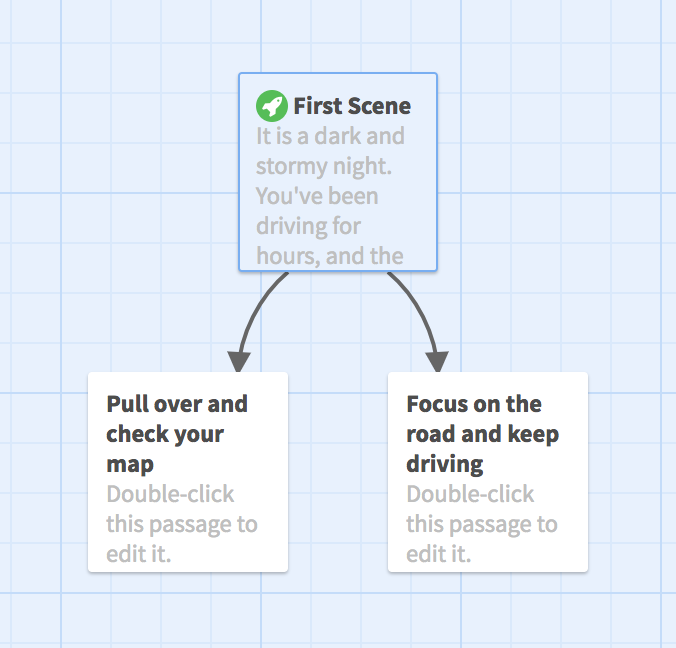
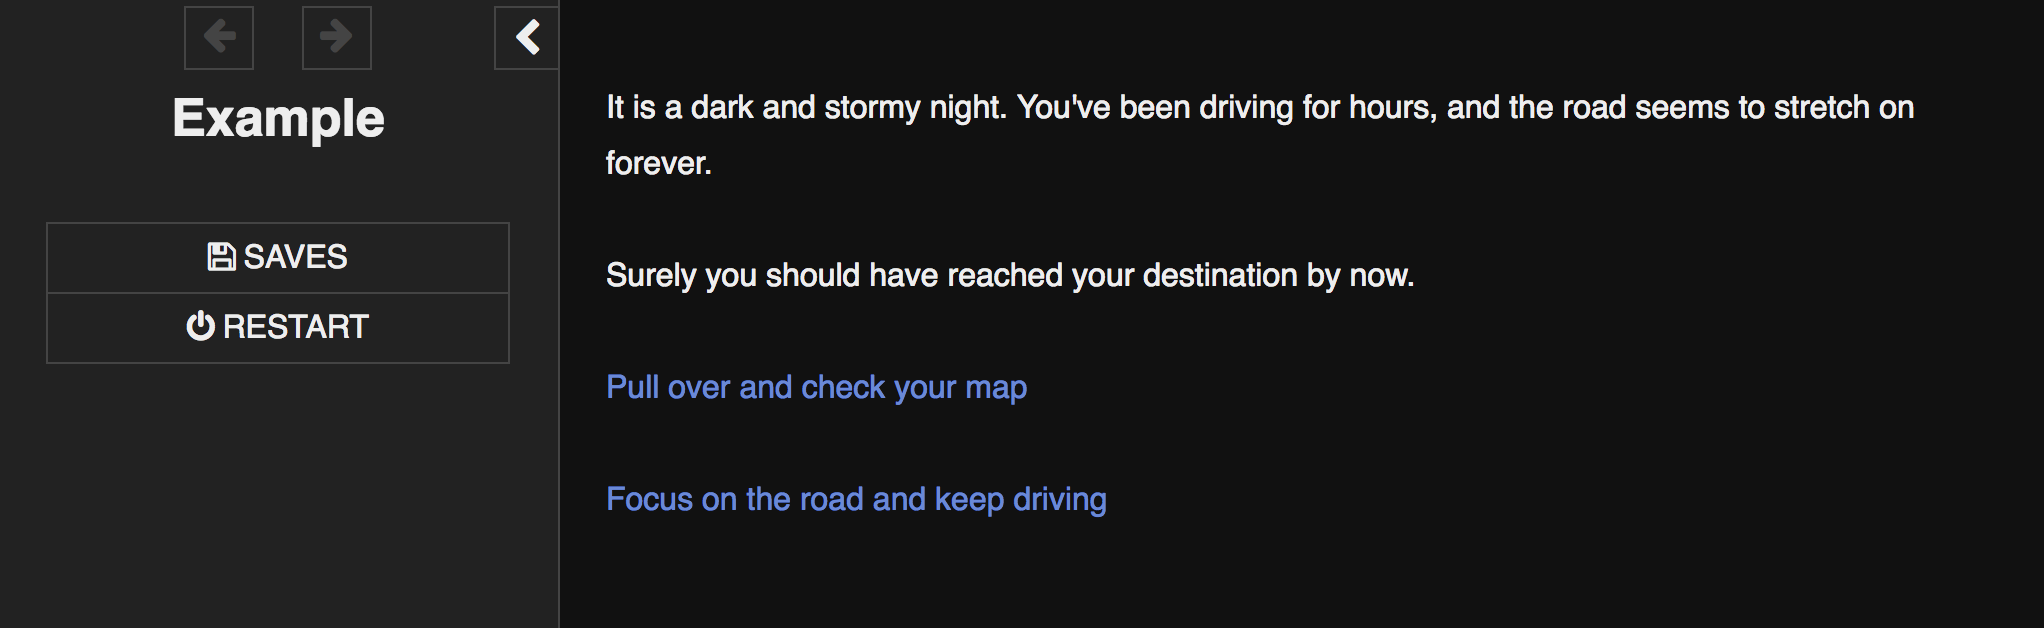
To make a link, you simply need to put a passage title inside of two sets of brackets. So, to link to a passage called “Pull over and check your map,” you would write a link like this:
[[Pull over and check your map]]

By adding more than one link to a passage, like in the image above, you’ll create what’s called a “branch point.” This is a point at which your story now splits, letting the player follow one branch or another by clicking your links.
It’s important to remember that when a player follows a branch, they will not see the content you wrote for a separate branch unless you explicitly allow them to by offering a link to that branch later in the story.
4. Creating alternate-text links
As you write, you may find a need to hide the title of a passage from your players. For instance, you may want to use an organized naming convention for your passages (e.g. A1, A2, A3, B1, B2, etc.), but not want the player to see those titles in the link text. For another example, you might want to hide loops or converging branches in your story with custom link text, letting you feed two branches into the same path with different link text that matches the story each branch has presented.
To do these things, you’ll need to use the alternate-text form of a link. These links show the player whatever text you would like, but still navigate to the correct passage when clicked.

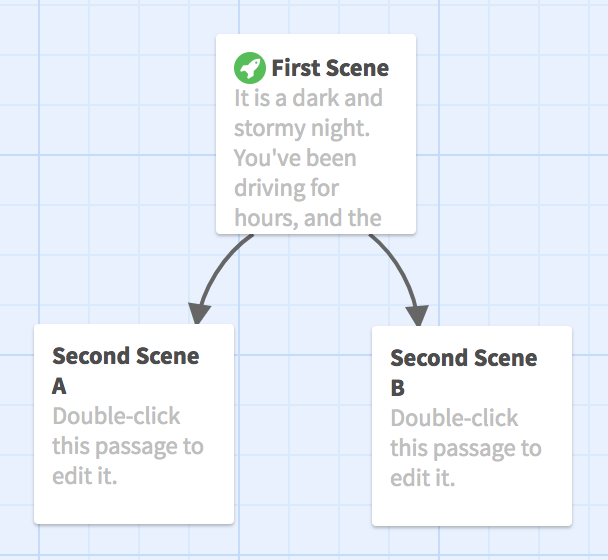
Alternate-text links use the pipe character (shift+backslash on your keyboard) to divide the display text from the title of the destination passage, like so:
[[Pull over and check your map|Second Scene A]]
That link will show the player the same text as before, but will direct the story to a passage called “Second Scene A.”
5. Changing Story Formats
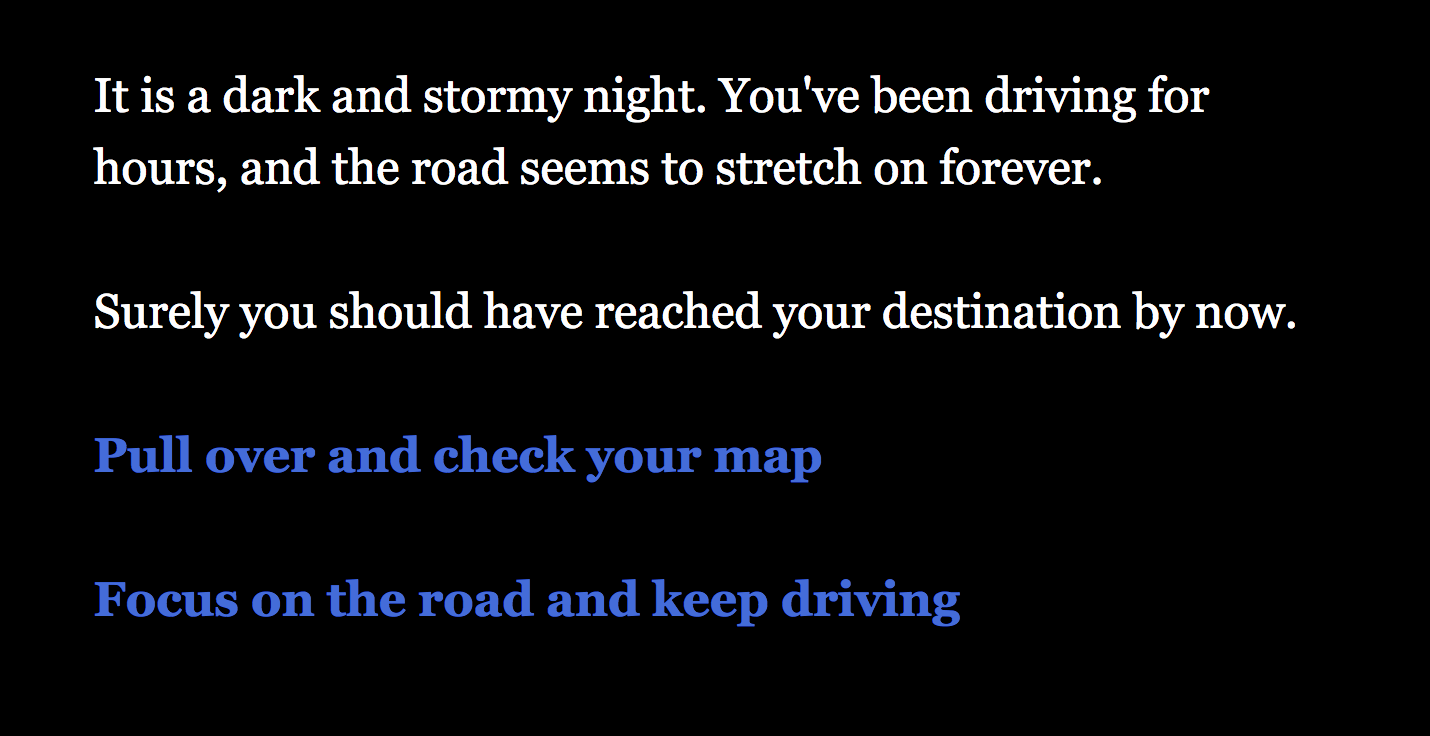
Twine’s story formats govern both the visual appearance of the published story in your web browser and the underlying syntax for programming more advanced Twine interactions. The default story format is called Harlowe, and it’s a simple design that adds only back and forward buttons to your content.
Another story format called SugarCube was the default format for Twine 1 (which is still a very useful tool itself). It adds a sidebar to the left-hand side of the page, showing the player the story title and some useful links.
Users who are familiar with Twine 1 may want to switch to SugarCube in Twine 2, as well (especially if you want to use macros and functions to program gameplay).
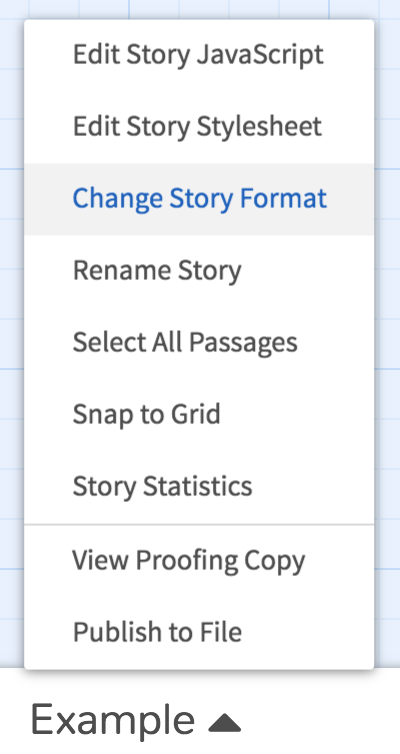
To change story formats, you’ll need to open the story menu from the lower left-hand side of the menu bar along the bottom of the application. Inside of that menu, you’ll find an option to “Change Story Format.”
6. Publishing a story
When you’re done writing, testing, and editing your story, you’ll need to publish it so that other people can read and play it. Twine files publish as HTML files, which are web pages that your browser can read. This makes them ideal for a writer’s web site or online portfolio, because they’ll work immediately for any visitor.
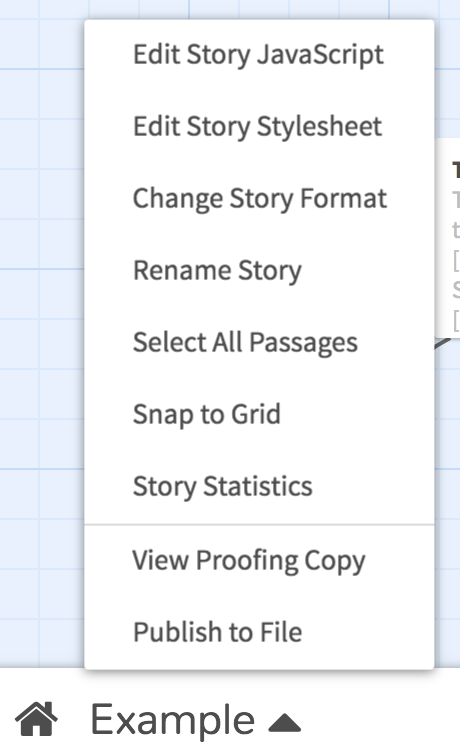
To create the HTML file for your story, you’ll need to click on the story menu in the lower left-hand side of the menu bar at the bottom of the application. Inside that menu, you’ll find an option called “Publish to File.”
You’ll need to name the file and select the save location on your computer. Once the file is done saving, you can upload it to your own site or publish it on another site like itch.io. If you edit your story after publishing it, you will need to go back and publish again in order to have your changes appear in your playable HTML file.